Why Colored Light Trails Turn White (and How to Fix It)
 5 min read
If your colored light trails keep coming out white in the middle, your camera isn't broken and neither is your light. One color channel on your sensor is filling up before the others, and once all three fill, you get white. This guide explains why it happens, why a light that looks dim can blow out harder than a bright white flashlight, and the handful of fixes that actually work. It also clears up a common misconception: the lumen rating on an RGB light can't be compared with the lumen rating on a white flashlight.
The short version
Why it happens
One channel clips first
A saturated color lands almost entirely in one of your sensor's red, green or blue channels, so that channel fills up long before the others.
Channel clipping
How to see it
Use the RGB histogram
The normal histogram can look fine while the blue channel is slammed against the right edge.
RGB, not luminance
How to fix it
Less light per pixel
Dim the light, stop down, move faster or diffuse it. A shorter shutter barely helps.
Dim first
Why colored trails turn white in the middle
Your sensor records every pixel as three numbers: red, green and blue. Each one has a ceiling. Once a channel hits it, that channel can't record any more light, no matter how much keeps arriving.
Paint a line in pure blue and nearly all of the light goes into the blue channel. The center of the line gets the most light, so blue maxes out there first. Keep adding light and the small amount leaking into red and green keeps climbing too. When all three are maxed, the pixel is white. The edges of the line got less light, so they stay blue, and you end up with a white core and a colored fringe.
That's why the fix is never "make the color stronger". The color is already as strong as the sensor can hold. The fix is less light on each pixel.
Why a dim looking light can blow out harder
Lumens, the number printed on every flashlight box, measure light weighted by how sensitive the human eye is to each color, and the eye is mostly a green detector. Green at 555nm counts fully, red at 630nm counts about 27%, and deep blue at 450nm counts about 4%.
Your camera doesn't use that curve. Its blue pixels pick up 450nm just fine. So a blue that looks dim to you can be putting out a lot of real light, and it all piles into one channel. A 40 lumen blue can push the blue channel as hard as a 500 lumen white flashlight, or harder, while your eye swears the white one is far brighter.
White light spreads across all three channels, so it takes longer to clip any one of them. That's why a white torch can look fine in a frame where a "weaker" color blows out.
Stephen Knight spotted the same thing independently in his RGB Critter BT review: colored light saturates a camera sensor faster than white, so a colored light looks far brighter in photos than its lumen number suggests.
How to check your exposure on the back of the camera
- Turn on the RGB histogram. Most cameras hide it a menu deeper than the regular one. Look for three separate graphs, one per channel.
- Watch the channel your color lives in. For a blue line, the blue graph is the only one that matters. If it's piled against the right edge, the core of your line is clipped.
- Turn on highlight warnings too. The blinking areas usually show the white core straight away.
- Zoom in on the trail. A white stripe running down the middle of a colored line is clipping, even if the histogram looks okay.
Five fixes, in the order we'd try them
- Dim the light. The easiest and best fix. For light painting, how low a light can go matters much more than how bright it gets. Blue and violet usually need the lowest setting of all.
- Stop down or drop the ISO. Going from f/8 to f/11 halves the light on every pixel. For a sense of scale, Stephen Knight shoots most of his light paintings at f/11 to f/16 and ISO 100, even on two minute exposures. Don't shorten the shutter to fix trail brightness: a moving light only lands on each spot briefly, so the shutter mostly changes how long you get to draw.
- Move faster, or stand farther back. Every second you hold a light on one spot, more light piles onto the same pixels. A quicker stroke spreads it out.
- Diffuse it. The same light through a tube, a blade or a saber spreads over a much bigger area, so no single pixel takes all of it.
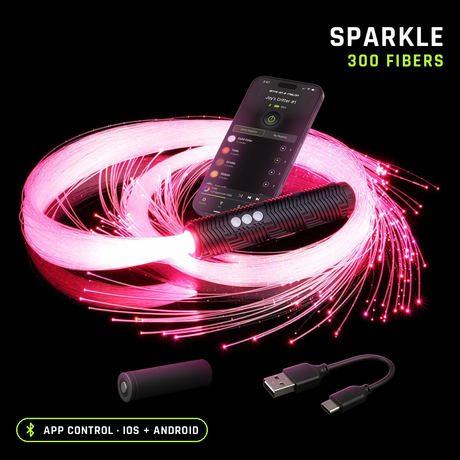
- Tame the hot end of long tools. Sabers and fiber tools are brightest where the light goes in. Stephen Knight has a neat trick for this in his five useful light painting tips: a wrap of white masking tape over the input end evens out the glow.
A 60 second test frame
Before a real shoot, lock your settings, then paint one short line in each color you plan to use, at the brightness you plan to use. Check the RGB histogram and zoom in on each line. Any color that shows a white core needs to come down a step or two. It takes a minute and saves a whole night of pale trails.
One more thing to check while you're there: whether your light dims with PWM. Many lights dim by flickering very fast, and at low brightness or close to the camera that can show up as dotted trails. If your light has a smooth or analog dimming mode, use it for light painting.
If you want the numbers behind why a dim looking color can outshoot a bright white, see RGB lumens vs white lumens.
For the full base recipe and a settings cheat sheet for orbs, portraits and big outdoor scenes, see our light painting camera settings guide.