Light Painting Photography – Create Stunning Long Exposure Light Art
 7 min read
Light painting photography is long exposure photography where you are the brush: the shutter stays open, you move a light through the frame, and the camera records the trail. We are Ants on a Melon — we design and assemble light painting tools in Oregon, and we have spent years in dark tunnels and desert nights shooting with them. This is the tutorial we wish we had when we started: the gear that actually matters, camera settings that work on the first try, and the core techniques, step by step.
What is light painting photography?
Painting with light (you will also see it called light drawing, light trail photography, or long exposure light art) is simple in principle: in a dark scene, a long exposure captures every position of a moving light source as one continuous streak. Your camera's sensor is the canvas, and whatever glows — a flashlight, a fiber optic whip, a glow stick — is the brush. The results range from abstract ribbons of color to portraits wrapped in glowing orbs, and none of it requires Photoshop trickery. Everything you see in the photos on this page happened in-camera.

The gear you need to start
Four essentials, nothing exotic
You can start light painting tonight with gear you probably already own:
- A camera with manual or Bulb mode. Any camera with full manual control works — the Canon EOS R6, Sony A7 III, and Nikon Z6 II are all popular choices, but so is a phone with a manual-shutter app.
- A tripod. Non-negotiable. Your exposures will run 10–30 seconds, and any camera movement smears the whole frame, not just the light.
- A light source. Flashlights, LEDs, fiber optics, glow sticks — anything that glows can paint. A light with precise color control gives you repeatable results; mixing colors builds layered trails.
- A dark location. Darkness is your black canvas. The less ambient light, the cleaner your trails.
Nice to have: a remote shutter release (so pressing the button never shakes the camera) and filters or gels to modify color — combined with LED tubes they produce smooth gradients.
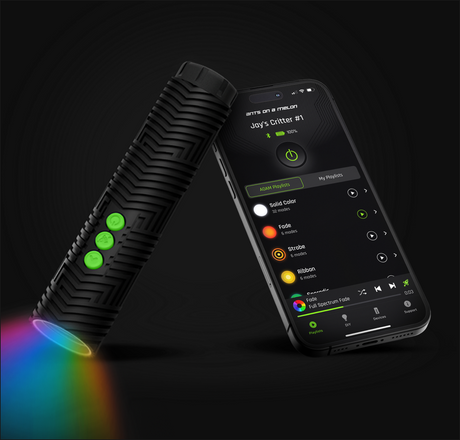
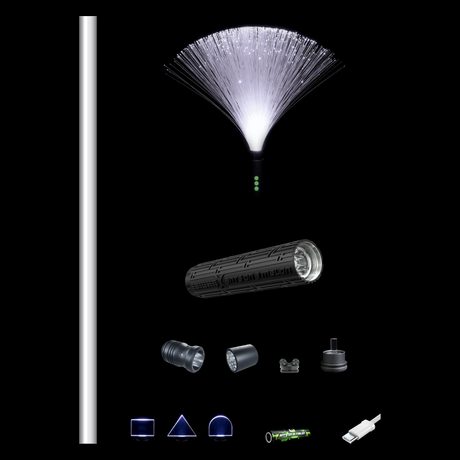
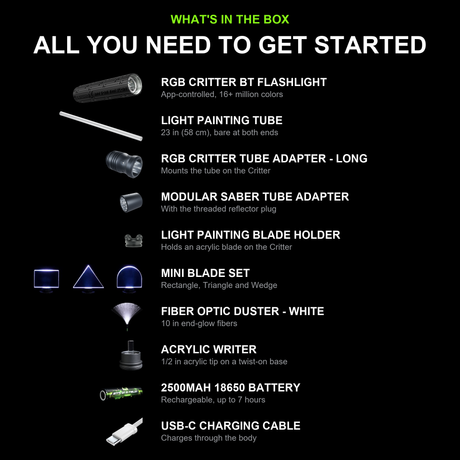
When you outgrow the junk-drawer flashlight, that is where we come in: our light painting tools are built around the app-controlled RGB Critter BT flashlight — 170 lumens, 16 million colors, 145+ modes, and unlimited custom playlists from your phone (it works without the app too). The same removable light twists into 200+ tools: blades, whips, sabers, dusters, and more. Not sure which light to use? See our honest guide to the best light painting flashlights in 2026.

Camera settings for light painting
The starting point that works almost every time
Set your camera to full manual, then dial in:
- Shutter speed: 10–25 seconds, or Bulb mode when you want to control the exposure length by hand.
- Aperture: f/5.6–f/11, depending on how much ambient light is around.
- ISO: 100–400 for minimal noise. In light painting, the light source is bright — you rarely need more.
- Focus: manual, set on your subject (or infinity for wide scenes). Autofocus hunts in the dark; lock it before the lights go out.
Pro tip: trigger the shutter with a remote release or your camera's self-timer so your hands never touch the body mid-exposure.
Starting points by style — tweak from here rather than guessing from zero:
- Abstract trails: 15–25s, ISO 200, f/8
- Light orbs: 10–20s, ISO 400, f/5.6
- Portrait glow: 8–15s, ISO 200, f/4
- City light trails: 5–10s, ISO 400, f/11
Shooting on a phone? Put it on a tripod and use an app with manual shutter control, like ProCam or Slow Shutter Cam. The technique is identical.

Light painting techniques, step by step
Your first light painting in six steps
- Mount your camera securely on a tripod and frame the scene.
- Choose a dark location — outdoors at night or a blacked-out room.
- Set manual exposure. Start with 10 seconds, ISO 200, f/8.
- Open the shutter and move your light slowly and purposefully — wave it, draw shapes, or trace the outline of an object. Keep the light moving; wherever it lingers burns brighter.
- Check the shot, then adjust aperture, ISO, and timing until the trails and the scene are balanced.
- Edit afterward to taste — a gentle push of glow, contrast, and color goes a long way.
The secret is a balance of patience, rhythm, and creative control. Your first frames will be messy. Your tenth will surprise you.

Light orbs: the signature move
- Stand in one spot and pick a fixed center point in front of you.
- Spin your light in a steady vertical circle, keeping the center point locked.
- Rotate your body slowly in place as you spin — the overlapping circles stack into a glowing sphere.
- Step out of frame before the shutter closes. If you kept moving, you will not appear in the shot at all.
Orbs reward consistency: same radius, same speed, same center. A light on a tether or a fiber optic whip makes the circle much easier to keep uniform.

Portrait light painting: wrap a person in light
- Pose your subject and ask them to hold completely still — they are being exposed for the entire shot, and any movement blurs their face.
- Give them something stable to lean on for longer exposures.
- During the exposure, paint behind or around them: halos, wings, outlines. Keep the light aimed away from the lens except where you want a visible trail.
- Optionally, pop a brief flash of light onto their face at the start or end of the exposure to render them crisply.

Fixing the four most common mistakes
- Camera shake? You skipped the tripod. Use a sturdy one, and trigger with a remote or timer.
- Overexposed, blown-out trails? The light is too bright for the exposure. Lower the ISO or shorten the exposure.
- Weak, washed-out trails? Too much ambient light. Find darker surroundings or wait for full dark.
- Blurry portrait subject? They moved. Shorten the exposure, give them support, and ask them to hold still.
Once these click, everything else is style: abstract trails on black backgrounds, portraits ringed with orbs, cinematic city light trails, spinning galaxy orbs. Every shot is a dance of physics and imagination.

Gear you'll want
One light that does everything in this tutorial
$139.95. App-controlled, 16 million colors, 145+ modes, and it powers 200+ twist-on tools.
Starting from zero
Light Painting Photography Kit for Beginners
$199.95, which costs less than buying the pieces separately.
Crisp shapes, letters, and detailed trails
Blades from $4.95, and the Blade Holder is $19.95.
Orbs, whip trails, and performance shots
From $159.95. Comparing whips first? Read our honest best fiber optic whips comparison.
Pick your own combination
Build exactly the set you want, or browse all light painting tools.
Light painting photography FAQ
What is light painting photography?
A long exposure technique where a moving light source paints glowing trails in the air. The camera stays still on a tripod; the light does the moving.
Can I do light painting with a phone?
Yes. Use a tripod and an app with manual shutter control, like ProCam or Slow Shutter Cam. Settings and technique are the same as with a dedicated camera.
What are the best camera settings for light painting?
Start with ISO 200, f/8, and a 15 second shutter, then adjust based on how bright your light is and how close it passes to the camera.
What light tools work best?
Anything that glows can paint — glow sticks included — but professional LED wands, light painting blades, and fiber optic tools give you controllable color and repeatable results. Find ours at Ants on a Melon.
Do I need to edit light painting photos?
Not much. The trails are captured in-camera; a light post-shot pass to enhance glow, contrast, and color is usually all it takes.
How long does the RGB Critter BT battery last?
Up to 7 hours of runtime on a single USB-C charge, which comfortably outlasts a night of shooting.
Can I use multiple lights together?
Yes. You can sync up to 10 RGB Critter BT units for coordinated group shots and light shows.
Keep going with these guides: