Light Writing: How to Write Words and Draw With Light
Writing words in glowing light, sometimes called light graffiti, is one of the most fun light painting techniques and a favorite for names, messages, and signs. We are Ants on a Melon, and this guide covers the gear, the settings, the one trick that trips everyone up (writing backwards), and how to keep your letters clean. It expands on the light-writing step in our light painting tutorials.
Step 1: Set up the shot
What you need: four things, nothing exotic
- A camera with manual or Bulb mode (or a phone with a long-exposure app).
- A tripod. Non-negotiable: any camera movement during the exposure smears the whole word.
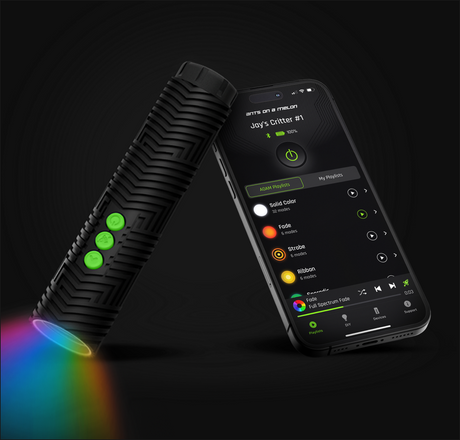
- A focused light you can switch on and off easily. The RGB Critter BT works well because you can pick a color and adjust brightness before you start writing.
- A dark space. Indoors with the lights off works; outdoors, get away from streetlights.
Camera settings: a starting recipe
Dial these in once, then leave the camera alone. Every adjustment after this happens with the light, not the camera.
- Mode: Manual or Bulb.
- Shutter: 10 to 15 seconds â enough time to write your word. If you keep running out of time, switch to Bulb.
- ISO: 200.
- Aperture: f/8.
- Focus: manual, pre-focused on the spot in the air where you will write. Stand there, focus on yourself (or have a friend hold the light there), then do not touch the ring again.
- White balance: Daylight, so your chosen light color comes through as the color you picked.
Step 2: The mirror-writing trick
Why your first word comes out backwards, and the two fixes
This is the part everyone gets wrong the first time. You face the camera, so anything you write reads mirror-reversed to the lens. Two ways to handle it:
- Write it backwards from your point of view: start at the right, move left, and mirror each letter. Sounds hard, gets easy fast â most people have it down within a few practice words. Rehearse the word once with the light off before you burn an exposure on it.
- Or write normally and flip the final image horizontally in any photo editor. Easiest if reversing hurts your brain, and the result is identical.
Neither way is "more correct." Performers who write live for a crowd learn the mirror version; photographers shooting for the final image usually just flip in editing.
Step 3: Pick your writing tool
The light is your pen, so choose the stroke you want
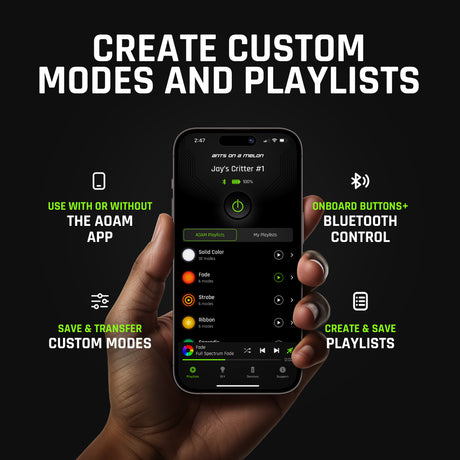
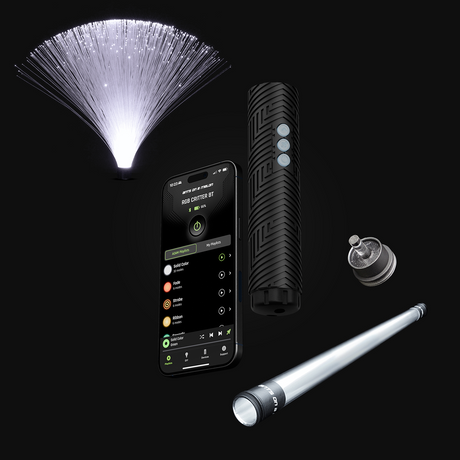
A small focused light gives you a clean, consistent line â the light-writing equivalent of a marker. The RGB Critter BT is the one we build for exactly this: a 170-lumen, app-controlled color-changing flashlight with 16 million colors and 145+ modes, so you can set an exact color and brightness per attempt (it works without the app too). It is also the removable core that powers 200+ twist-on light painting tools, so the same light grows with you.
Once single-line words feel easy, twist-on tools change the stroke itself: an 8mm acrylic Light Painting Blade turns each letter into a wide glowing ribbon instead of a thin line, and a Fiber Optic Duster gives a soft multi-strand stroke. Browse the full light painting tools collection when you are ready to experiment.
Step 4: Write the word
- Pick a short word and a single bright color. The shorter the word, the easier every part of this gets.
- Picture a large invisible whiteboard in the air in front of you, at your pre-focused distance. Everything you write happens on that plane.
- Start the exposure with a 2-second timer or a remote so you do not shake the camera.
- Switch the light on only while drawing each stroke; turn it away or off between letters so you do not get connecting lines. This on-off rhythm is the whole craft.
- Keep letter height and spacing consistent â big, slow, and even beats fast and fancy. Review the shot and reshoot.
Step 5: Tips for cleaner letters
Small habits, much cleaner words
- Big letters are easier to keep legible than small ones. Use your whole arm, not your wrist.
- Rainbow words: set the RGB Critter BT to change color and write each letter a different shade.
- Outline shapes (a heart, a star) are more forgiving than cursive for your first tries.
- Wear dark clothing and keep moving so you do not appear in the frame â the camera only records where light lingers.
Troubleshooting the four classic failures
| Problem | Cause | Fix |
|---|---|---|
| Word reads backwards | Wrote normally facing the camera | Write mirror-reversed, or flip the photo in editing |
| Letters connected by stray lines | Light stayed on between strokes | Switch the light off or away between letters |
| Ran out of time mid-word | Exposure too short | Use Bulb mode or a longer shutter |
| Uneven, hard to read | Inconsistent height and spacing | Go bigger and slower; practice the word once unlit first |
Gear you'll want
The light itself
170 lumens, 16 million colors, 145+ modes via the iOS/Android app; works without the app too.
Wide ribbon strokes instead of thin lines
8mm acrylic blades that twist onto the RGB Critter BT. Want laser-cut detailing? See the Pro Blades.
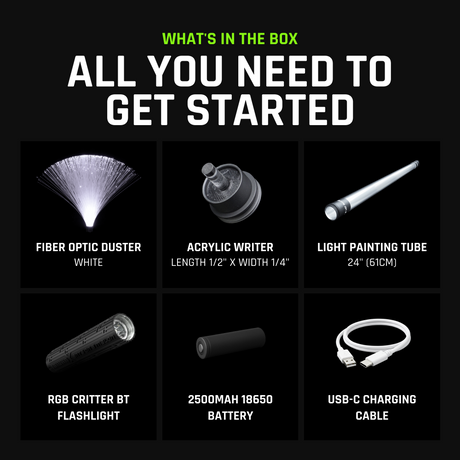
Starting from zero
The beginner bundle â saves $54 versus buying the pieces separately.
Want to pick your own tools
Build a custom set in the Kit Builder, or browse all light painting kits.
FAQ: Light Writing
How do you write words with light in a photo?
On a tripod with a long exposure, draw each letter in the air with a handheld light, switching it off between letters. Write mirror-reversed so it reads correctly, or flip the image afterward.
Why does my light writing come out backwards?
Because you face the camera, so your writing is mirrored to the lens. Write it backwards, or flip the final photo horizontally.
What settings work for light writing?
Start at a 10 to 15 second shutter, ISO 200, f/8, manual focus, Daylight white balance, in a dark space.
What light should I use?
A small focused light you can switch on and off. An app-controlled light like the RGB Critter BT lets you change color per letter.
Can I write with light using just my phone?
Yes â a phone with a long-exposure app on a tripod works for the camera side. You still need a separate handheld light to write with, since the phone has to stay still on the tripod.
You might also find these guides useful: