Advanced Light Painting Techniques: Stacking, Kinetic Rigs & Color Control
Once you have the basics down â a tripod, a dark scene, and a long exposure â the next leap in light painting comes from technique, not gear. We build light-painting tools for a living, and these are the methods working light painters actually use to make images that look impossible in a single take: stacking, kinetic rigs, synchronized color, and one app setting most people never touch. All of them pair naturally with the RGB Critter BT and its tool ecosystem, but the ideas transfer to any light you own.
1. Exposure stacking: one stroke per frame
Instead of cramming an entire scene into one heroic long exposure, shoot each light element as its own frame and combine them in post. This is how complex, multi-tool compositions get made solo, and it gives you full control over every stroke.
- Lock your camera on a tripod and do not move it between frames. Everything depends on perfect registration, so tighten every knob and keep your hands off the body between shots.
- Shoot the ambient or base scene first â the room, the landscape, any subject you want sharp.
- Paint one element per frame: a left light trail, a right trail, a subject outline, a background glow. If a stroke goes wrong, only that frame gets reshot.
- Stack the frames in Photoshop or an equivalent using the Lighten blend mode, which keeps only the brightest pixels from each layer â light trails add together, dark backgrounds disappear.
Why it matters: stacking lets you fix a single botched stroke without reshooting the whole image, and it removes the pressure of doing everything in one take. Most of the layered, "how is that one exposure?" images you admire are not one exposure.
2. Kinetic rigs: let physics draw for you
Attach the light to motion and let rotation do the drawing. Spinning a Critter on a controlled rig produces perfect geometric orbs, spirals, and vortexes that are nearly impossible to draw freehand.
- Rig the light on a fixed axis â a Critter Connector or a simple string rig both work. The steadier the axis, the cleaner the circular form.
- Spin at a constant speed through the exposure. Even rotation gives even trail spacing; speeding up and slowing down reads as wobble.
- Walk the spin point through the frame during the exposure to stretch an orb into a tube or tunnel.
- Combine two linked Critters in different colors for layered, counter-rotating patterns.
We cover the full rig setup, step by step, in our dedicated walkthrough on photographing light orbs.
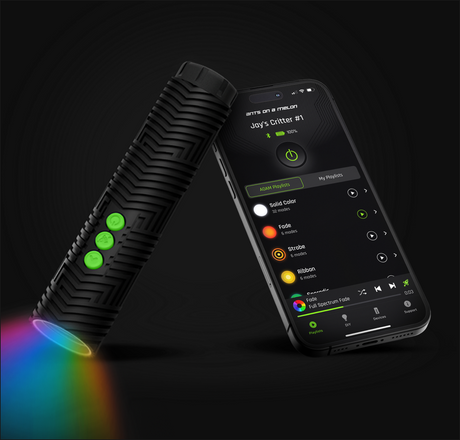
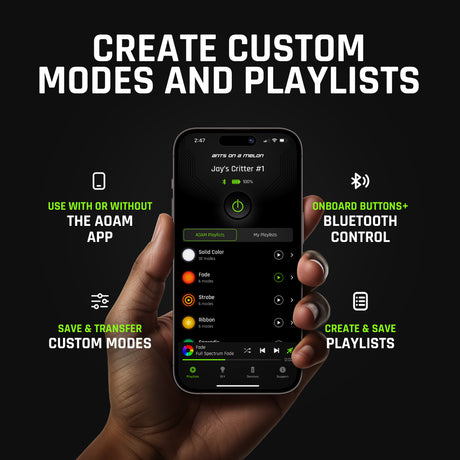
3. Multi-device control: one palette, every tool
The Critter BT app can drive up to 10 connected lights at once, and for advanced work this is the difference between a color scheme and color chaos. Pre-set an entire palette across multiple tools and trigger synchronized color, so a complex scene stays color-consistent across every stroke.
- Before the shoot, build a named playlist with the exact colors your scene needs.
- Connect every light you are using and push the palette to all of them at once.
- Recall the playlist instantly between frames â your blues stay the same blue all night, across every frame you plan to stack.
Because the app offers 16 million colors and unlimited custom playlists, you can build and save a distinct palette per project rather than eyeballing hues in the dark.
4. Analogue mode: the cleanest trails you are not using
This is the single most impactful setting most light painters miss. The RGB Critter BT offers an Analogue mode that drives the LEDs with smooth, continuous output, and a PWM mode that pulses them. In independent testing, Analogue produced noticeably brighter, more saturated trails at the same brightness setting, while PWM could show faint strobing on bare-fiber tools at close range. The takeaway from reviewers: use Analogue for light painting photography.
- Open the app and switch the light to Analogue mode before you start painting.
- Shoot a test stroke and check it at 100% zoom â trails should be continuous ribbons with no dotted edges.
- Save PWM for when you actually want a trippy tracer texture in flow performance; it is a look, not a flaw, when it is on purpose.
We break the difference down further in our app guide.
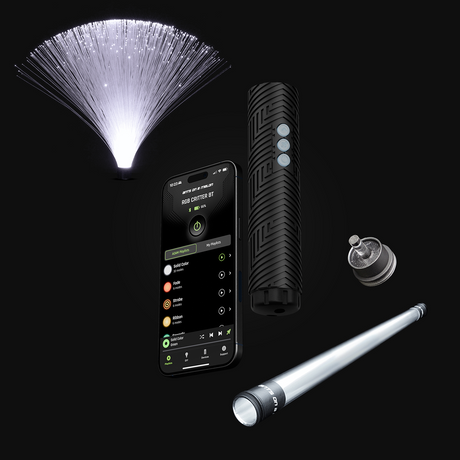
5. Mixed shapers: one light, many textures
Advanced images rarely use one shaper. Each tool leaves a different signature, and stacking lets you combine them without juggling gear mid-exposure.
- Use a tube for bold, wide backdrops and fills.
- Use a blade for crisp, controlled edges and accents.
- Use a fiber tool for organic, wispy texture.
- Shoot each on its own stacked frame, then combine with the Lighten workflow from technique 1.
Because every shaper runs on the same Critter, you can keep color and brightness consistent across all of them â twist one tool off, twist the next on, same light, same palette. The full accessory guide shows what each tool brings.
6. Post-processing: finish like a photographer
Even purists benefit from light cleanup. The exposure is the paint; the edit is the varnish.
- Shoot in RAW so you retain the latitude to recover highlights in bright trails.
- Dodge and burn to balance trail brightness across the composition.
- Mask out accidental light leaks â a headlamp bounce, a stray reflection.
- Grade color last, for mood, once the trails themselves are balanced.
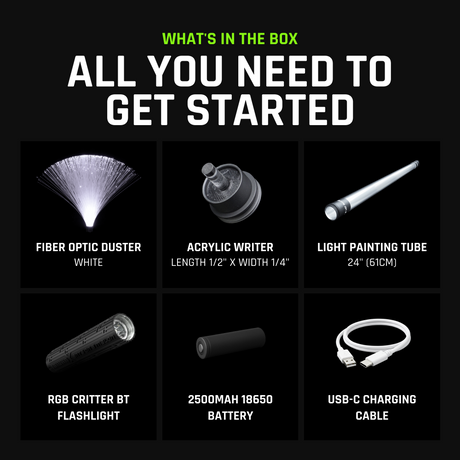
Gear you'll want
The core light behind every technique here
App-controlled, 170 lumens, 16 million colors, 145+ modes â and it works without the app too. It is the removable core behind 200+ twist-on tools.
Crisp edges and detailing
Light Painting Blades (8mm acrylic) or Pro Blades with laser-cut detailing
Bold backdrops and fills
Organic, wispy texture
Build a full multi-tool setup in one go
Pick the light, shapers, and spares in one checkout. Browse everything in the full light painting tools collection.
Advanced techniques FAQ
What camera settings should I start from?
Manual mode, low ISO (100â400), a narrow aperture (f/8âf/11) for depth and to keep trails from blowing out, and a shutter of several seconds to minutes (use Bulb mode for very long paints).
Do I need multiple lights to do this?
No. Stacking and kinetic rigs work with a single Critter. Multi-device control is an upgrade for synchronized, multi-tool scenes.
Why do my trails look choppy or strobed?
Switch from PWM to Analogue mode, and slow your movement slightly. Strobing is most visible with fast motion, bare-fiber tools, and the camera close to the light.
What is the best tool for perfect circles?
A spinning rig with a Critter on a fixed axis. Freehand circles are hard; let rotation do the work.
Do I need the app for these techniques?
The Critter works without the app, but the advanced techniques lean on it: Analogue mode, synchronized multi-device color, and saved custom playlists all live there, on iOS and Android.