Fiber Optic Whip Techniques: How to Flow With a Light Whip
 5 min read
This is the practical guide: what a fiber optic whip actually is, and how to flow with one once it is in your hand. (Deep in shopping mode instead? Start with what a fiber optic whip is, how to choose one, and our honest three-brand comparison.)
The 60-second primer
What it is and how it works
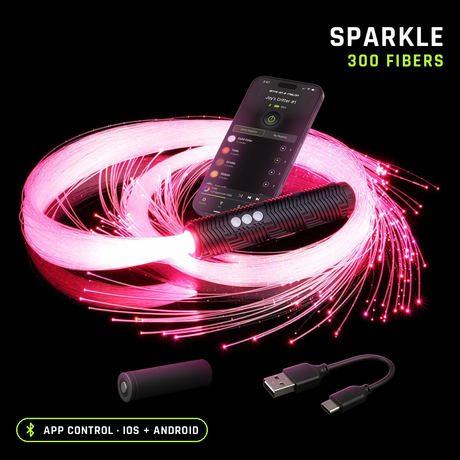
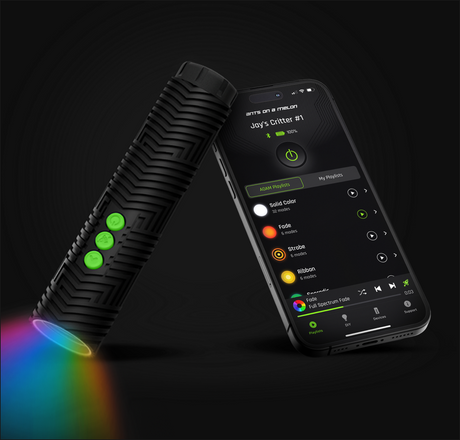
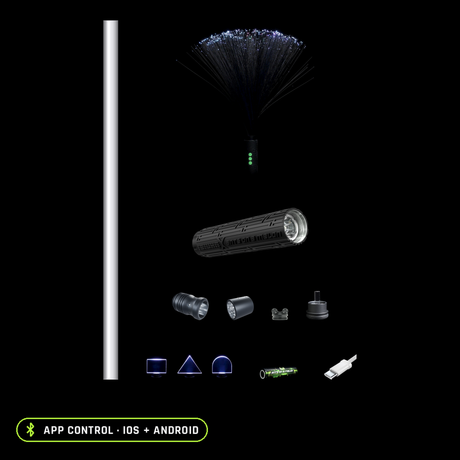
A fiber optic whip is a handheld light source feeding a bundle of hundreds of hair-thin optical fibers. Light enters the bundle at the handle and is carried down each strand, so every fiber becomes its own glowing trail; swing the whip and the whole bundle fans out into ribbons of light. On the BitWhip, that light source is our removable RGB Critter BT flashlight: app-controlled with 16.7 million colors, 145+ modes, and unlimited custom playlists (it works without the app too), and when the whip head twists off, the same light powers 200+ other twist-on tools.
The types you'll run into
Fiber comes in two styles, End Glow and Sparkle. Sparkle is the more delicate of the two, and the full breakdown is in our End Glow vs Sparkle guide. Bundles also vary in density and length: the BitWhip comes with 140, 200, or 300 fibers, in a 5.5 foot standard (or uncut) length or a 7 foot extra long, all spinning on a 360-degree bearing so the fibers never tangle mid-move.

Choosing one without the guesswork
We keep the buying advice out of your way on this page. The choosing guide walks through the decisions one at a time, and the three-brand comparison is where we tell you exactly when a competitor's whip is the better buy than ours. Everything below assumes a whip is already in your hand. Every whip we make sits in one place, our fiber optic whips collection.
Grip and stance
Hold the handle loosely, like a wand rather than a hammer: the whip does the work, and a soft grip lets the 360-degree bearing spin freely so fibers never tangle. Stand relaxed, elbow soft, and give yourself an arm-plus-whip radius of clear space. Because the fibers are soft, mistakes cost nothing but a tickle, which is why whips are the friendliest prop to learn.
Five moves for your first night
- Side circles. Spin the whip in a flat circle beside you, like stirring a giant pot. Switch sides, then switch hands. This is the foundation everything builds on.
- Helicopter. Raise it overhead and keep the circle flat above you. Instant crowd-pleaser, and it teaches wrist control.
- Figure 8s. Trace a sideways 8 in front of you, letting the wrist roll through the crossover point. Smooth figure 8s are the difference between spinning and flowing.
- The flick. A gentle forward cast, like a slow-motion fishing cast, so the fibers extend fully and cascade back down. This is the signature waterfall-of-light photo moment.
- Walking flow. Keep a side circle going while you walk. Movement plus prop is the whole art form in miniature.
Leveling up
- Body wraps. Let the fibers wrap around your arm or torso, then reverse the spin to unwrap in a spiral of light. Start slow; the reveal is the trick.
- Stalls. Kill the whip's momentum for a beat (a still pose while the fibers settle over you), then relaunch. Contrast makes flow look intentional.
- Layering with dance. Once moves are automatic, stop thinking about the whip and move to the music; the whip amplifies whatever your body does.
- Doubles. Two whips, one in each hand, mirrored or offset. The Double BitWhip syncs both from one app so the colors travel together. Setups, syncing and what to learn first are in our double fiber optic whip guide.
- Color as choreography. On an app-controlled whip like the BitWhip, build playlists that shift palette with the set: color changes read as moves.
Protecting your whip while you learn
Grass, sand, and dance floors are kind to fibers; pavement is not, so avoid full-force ground strikes while learning outdoors. Sparkle fiber is more delicate than end glow (here is why), and everything else you need is in the care and maintenance guide.
Filming and photographing whip flow
Phone video: film in dim (not pitch black) light so your silhouette reads, and try slow motion for the flick. Photography: put a camera on a tripod, use a 5 to 15 second exposure, and one whip pass becomes a river of light; our light painting guide covers settings, and the BitWhip's removable light drives dedicated light painting tools between whip shots. For full settings, framing and phone tips, see how to photograph a fiber optic whip.
Gear you'll want
Your first whip
$159.95 for 140 fibers, up to $179.95 for 300. 140 to 300 fibers, End Glow or Sparkle, 5.5 or 7 foot lengths, lifetime warranty on the whip.
You already own an RGB Critter BT
$29.95 to $54.95 — the whip head twists onto the light you already have.
You want the whip plus the rest of a light kit
Pick the whip, then add the light, cases, and spares in one checkout.
Whip technique FAQ
How long does it take to learn a fiber optic whip?
Basic flowing looks good the first night; the five starter moves above take most people a weekend. Wraps, stalls, and doubles give you months of depth.
Will tricks break the fibers?
Normal flow, wraps, and body contact are exactly what whips are built for. What breaks fibers over time is hard pavement contact. End glow fiber is the tougher choice, fiber heads are replaceable, and our fiber bundles carry a lifetime warranty.
Can I practice indoors?
Yes, with a ceiling check: you need roughly arm-plus-whip clearance (a 5.5 foot whip needs more room than you think mid-helicopter). Fibers will not damage walls or furniture.
Do I need the app to flow?
No. The BitWhip works without the app. The app adds 16.7 million colors, 145+ modes, and unlimited custom playlists, which matters once color becomes part of your choreography; it is optional on night one.
Should I learn with one whip or two?
One. Doubles flow is a genuine skill jump; get figure 8s and wraps automatic with one hand first, then add the second.